Best TH16 Attack Strategies 2026 — Top War & CWL Armies
Master the best TH16 attack strategies for 2026. Complete guide to Root Rider Smash, GoBoWitch, Hybrid, Electro Dragon, and more with full army compositions and deployment guides.
Table of Contents
Town Hall 16 is where Clash of Clans starts to feel truly competitive. With access to all four heroes at high levels, Root Riders, powerful hero equipment, and Siege Machines, TH16 players have a massive toolkit to work with. But TH16 defenses are no joke — Scattershots, max Inferno Towers, Eagle Artillery, Monolith, and Spell Towers can shut down poorly planned attacks in seconds.
This guide covers the best TH16 attack strategies for 2026, with complete army compositions, spell loadouts, hero equipment picks, and step-by-step deployment instructions for each one. Whether you are warring, pushing trophies, or competing in CWL, these are the strategies that consistently deliver 3-stars.
TH16TH16 Overview — Your Arsenal
Before jumping into strategies, here is what makes TH16 a pivotal Town Hall level:
Town Hall 16 building- Four Heroes — Barbarian King, Archer Queen, Grand Warden, and Royal Champion all available at high levels. Hero equipment plays a major role in every strategy.
- Root Riders — Unlocked at TH15, Root Riders are fully upgraded at TH16 and form the backbone of the most dominant strategies.
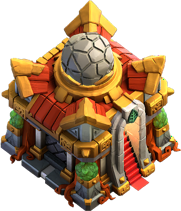
- Monolith — The Monolith defense deals percentage-based damage that shreds high-HP troops. Positioning around it is critical for every attack.
- Spell Tower Level 3 — Can hold Rage, Poison, or Invisibility, adding unpredictable defensive power.
- All Siege Machines — Wall Wrecker, Battle Blimp, Stone Slammer, Log Launcher, Siege Barracks, and Flame Flinger are all available.
- Hero Equipment System — TH16 has access to most hero equipment. Your equipment choices often determine whether an attack is a 2-star or 3-star.
The biggest challenge at TH16 is the Monolith. Unlike other defenses that deal flat damage, the Monolith deals damage based on the troop's max HP — meaning tanky troops like Golems and Yetis melt faster than expected. Strategies at TH16 need to account for this.
Strategy 1: Root Rider Smash
Root Rider Smash dominates TH16 just as it does at higher Town Hall levels. Root Riders ignore walls, deal heavy damage, and have enough HP to push through multiple compartments. Combined with Witches for distraction and proper spell support, this is the most reliable TH16 war strategy.
 Root Rider troop
Army Composition
| Troop | Quantity | Role |
|---|---|---|
| Root Rider | 7 | Main damage + wall breaking |
| Witch | 6 | Skeleton distractions |
| Ice Golem | 2 | Front-line tank + freeze |
| Healer | 2 | Sustain the push |
| Archer | 5 | Funnel cleanup |
Spells
| Spell | Quantity | Purpose |
|---|---|---|
| Rage Spell | 3 | Boost Root Riders in core |
| Heal Spell | 1 | Sustain through splash |
| Freeze Spell | 2 | Disable Infernos |
| Earthquake Spell | 4 | Open core compartments |
Hero Equipment
- Barbarian King: Rage Vial + Giant Gauntlet
- Archer Queen: Healer Puppet + Giant Arrow
- Grand Warden: Eternal Tome (ground mode) + Healing Tome
- Royal Champion: Seeking Shield + Hog Rider Puppet
Step-by-Step Deployment
- 1Earthquake the core. Stack all 4 Earthquake Spells on the center compartment, targeting the area around the Town Hall, Eagle Artillery, and Monolith. This eliminates wall pathing issues for your Root Riders.
- 1Funnel both sides. Use Archers on corners, Barbarian King on one flank, and Royal Champion on the other. You need at least 2-3 buildings cleared per side so Root Riders path into the base, not around it.
- 1Ice Golems at entry. Deploy both Ice Golems at the center of your entry point to absorb the initial defensive fire from perimeter defenses.
- 1Root Riders in a spread line. Deploy all 7 Root Riders behind the Ice Golems. Spread them across your entry to ensure they cover the maximum area.
- 1Witches behind. Deploy 6 Witches behind the Root Riders. Their skeletons absorb single-target Inferno beams and distract point defenses while Root Riders deal damage.
- 1Grand Warden ground mode. Deploy the Warden to walk with the main push. His life aura boosts the HP of your entire group. Save Eternal Tome for when the group hits the core or the Monolith.
- 1Healers on Root Riders. Deploy 2 Healers behind the push to keep the Root Rider frontline alive.
- 1Rage the core. Drop Rage Spells as your troops enter the center. Raged Root Riders destroy buildings incredibly fast.
- 1Freeze Infernos. Multi-target Infernos shred this comp. Freeze them the moment your troops are in range. Single-target Infernos are handled by Witch skeletons.
- 1Heal through Monolith zone. The Monolith deals percentage damage that stacks up. Drop the Heal Spell when your group is near it. Alternatively, use a Freeze on the Monolith if your troops are low HP.
When to Use
- Most versatile TH16 strategy — works against most base layouts
- Best against compact bases with centralized defenses
- Earthquake opening handles wall-heavy bases
- Avoid against extremely spread ring bases
Strategy 2: GoBoWitch (Golem + Bowler + Witch)
GoBoWitch is a classic ground strategy that remains powerful at TH16. Golems tank the front while Bowlers deal ranged splash damage and Witches spawn skeletons for distraction. The key advantage of GoBoWitch at TH16 is its reliability — the deployment is straightforward and it works against a wide range of base designs.
 Golem troop
Army Composition
| Troop | Quantity | Role |
|---|---|---|
| Golem | 3 | Front-line tanks |
| Bowler | 8 | Main ranged splash damage |
| Witch | 6 | Skeleton spawns |
| Ice Golem | 1 | Additional tank + freeze |
| Archer | 4 | Funnel |
Spells
| Spell | Quantity | Purpose |
|---|---|---|
| Rage Spell | 2 | Core push |
| Heal Spell | 2 | Sustain Bowler/Witch group |
| Jump Spell | 1 | Core access |
| Freeze Spell | 2 | Inferno + Monolith control |
| Poison Spell | 1 | CC troops |
Hero Equipment
- Barbarian King: Rage Vial + Giant Gauntlet
- Archer Queen: Healer Puppet + Giant Arrow
- Grand Warden: Eternal Tome (ground mode) + Healing Tome
- Royal Champion: Seeking Shield + Hog Rider Puppet
Step-by-Step Deployment
- 1Funnel with heroes. Barbarian King on one side, Royal Champion on the other. Clear 2-3 buildings per side.
- 1Golems at entry. Deploy 2 Golems spread across the entry side, with the 3rd Golem slightly offset. Ice Golem goes in the center.
- 1Bowlers behind Golems. Deploy all 8 Bowlers in a line behind the Golems. Their bouncing boulders hit buildings behind the ones Golems are tanking, creating devastating chain damage.
- 1Witches on flanks. Deploy 3 Witches on each side of the main push. Skeletons flood forward and overwhelm point defenses.
- 1Jump Spell for core. Once the push reaches the first set of walls around the core, drop a Jump Spell to give troops direct access.
- 1Grand Warden ground. Deploy Warden with the push. Save Tome for when the group enters the core and faces Eagle + Inferno + Monolith fire.
- 1Rage inside the core. Drop Rage Spells when Bowlers and Witches enter high-value areas. Raged Bowlers deal massive splash damage.
- 1Heal through damage. Use Heal Spells when your group takes concentrated splash from Wizard Towers or Bomb Towers.
- 1Freeze threats. Freeze multi-target Infernos and the Monolith when your troops are in range. The Monolith's percentage damage is especially dangerous to Golems.
- 1Poison CC troops. Drop Poison on enemy CC troops immediately. Super Minions or Electro Dragons from the CC can wreck your Witch army.
When to Use
- Best against symmetrical bases with a clear core
- Strong against single-target Inferno bases (skeletons counter them)
- Reliable for CWL — low fail rate with proper execution
- Avoid against bases with multi-target Infernos covering the entire core
Strategy 3: Hybrid (Hog Rider + Miner)
Hybrid is the precision scalpel of TH16 strategies. While Smash and GoBoWitch use brute force, Hybrid uses a kill squad to eliminate key defenses, then deploys Hog Riders and Miners to surgically dismantle the remaining base. It requires more skill but rewards it with clean 3-stars.
 Miner troop
Army Composition
| Troop | Quantity | Role |
|---|---|---|
| Hog Rider | 16 | Defense targeting |
| Miner | 10 | Ground damage + self-heal |
| Ice Golem | 2 | Kill squad tank |
| Wizard | 3 | Kill squad funnel |
| Archer | 3 | Funnel support |
Spells
| Spell | Quantity | Purpose |
|---|---|---|
| Heal Spell | 5 | Keep Hog/Miner pack alive |
| Rage Spell | 1 | Kill squad |
| Poison Spell | 1 | CC troops |
Clan Castle: Log Launcher or Siege Barracks + Freeze Spell
Hero Equipment
- Barbarian King: Rage Vial + Earthquake Boots
- Archer Queen: Giant Arrow + Healer Puppet
- Grand Warden: Eternal Tome (ground mode) + Healing Tome
- Royal Champion: Seeking Shield + Hog Rider Puppet
Step-by-Step Deployment
- 1Identify kill squad targets. Before the attack, find the enemy CC, Eagle Artillery, and any key defense (Monolith or multi-Inferno) accessible from one side.
- 1Deploy kill squad. Ice Golems first, then Barbarian King. Use Wizards to funnel. Send Archer Queen once the path is clear — her Giant Arrow snipes the priority target.
- 1Rage the heroes. Drop Rage Spell on your hero group as they engage the key defenses.
- 1Poison CC. When enemy CC troops emerge, drop Poison immediately. Let your kill squad heroes clean them up.
- 1Deploy Hybrid pack. Once the kill squad does its job, deploy Hogs and Miners together on the opposite side. Send them in a line — Miners fill gaps between Hog targets.
- 1Grand Warden with pack. Deploy the Warden to walk with the Hybrid group. His aura and Tome are essential for surviving concentrated fire.
- 1Pre-place Heal Spells. Drop Heals AHEAD of where your Hog/Miner pack is heading. They move fast — you need Heals waiting for them, not catching up. Space 5 Heals evenly around their path.
- 1Warden Tome for danger zone. Save Eternal Tome for when the pack hits the heaviest cluster of defenses — often near the Monolith or remaining Infernos.
- 1Royal Champion cleanup. Send RC to snipe remaining defenses on a third angle. Her Seeking Shield reaches deep into compartments.
When to Use
- Best against bases with spread defenses (Hogs cover ground fast)
- Strong when key defenses are accessible from one side for the kill squad
- Excellent against bases with weak Giant Bomb placements
- Highest skill requirement — practice in Friendly Challenges first
- Avoid against bases with clustered Giant Bombs or ring layouts
Strategy 4: Electro Dragon + Balloon (E-Drag Spam)
E-Drag Spam remains a go-to at TH16 for players wanting reliable results without complex deployments. Electro Dragons chain lightning through clustered buildings while Balloons target defenses ahead. The key at TH16 is proper funnel management and Rage placement to maximize chain damage.
 Electro Dragon troop
Army Composition
| Troop | Quantity | Role |
|---|---|---|
| Electro Dragon | 7 | Main chain damage |
| Balloon | 10 | Defense targeting |
| Ice Golem | 1 | Funnel tank |
Clan Castle: Stone Slammer with Electro Dragon + Balloon
Spells
| Spell | Quantity | Purpose |
|---|---|---|
| Rage Spell | 4 | Boost E-Drag chains |
| Freeze Spell | 3 | Disable Air Defenses + Infernos |
Hero Equipment
- Barbarian King: Rage Vial + Giant Gauntlet
- Archer Queen: Healer Puppet + Giant Arrow
- Grand Warden: Eternal Tome (air mode) + Life Gem
- Royal Champion: Seeking Shield + Hog Rider Puppet
Step-by-Step Deployment
- 1Pick the clustered side. Identify which side of the base has the most tightly packed buildings. E-Drag chain lightning needs buildings close together.
- 1Funnel with heroes. Barbarian King on one flank, Royal Champion on the other. Clear corner and edge buildings.
- 1Balloons first. Deploy 2 Balloons per Air Defense on your entry side. They distract and damage Air Defenses before E-Drags arrive.
- 1E-Drags in a spread line. Deploy all 7 Electro Dragons across your entry side. Do not bunch them — spreading ensures maximum chain coverage.
- 1Stone Slammer to core. Send the CC Stone Slammer toward the Town Hall. It tanks while the CC E-Drag chains from deep inside the base.
- 1Grand Warden air mode. Deploy Warden behind the E-Drags. His aura keeps them alive longer. Save Tome for Eagle Artillery volleys.
- 1Rage the chains. Drop Rage Spells on building clusters where E-Drags are actively chaining. A raged E-Dragon chain can clear an entire section.
- 1Freeze key defenses. Freeze Air Defenses, multi-Infernos, or the Monolith when they threaten your E-Drags.
- 1Remaining Balloons. Deploy leftover Balloons to clean up defenses on the flanks that E-Drags might miss.
When to Use
- Best against compact bases with tightly clustered buildings
- Strong when Air Defenses are on the perimeter
- Easiest deployment of any TH16 strategy — great for CWL consistency
- Avoid against spread bases where chain lightning cannot connect
Strategy 5: PEKKABoBat (PEKKA + Bowler + Bat Spell)
PEKKABoBat is a powerful split strategy. PEKKAs and Bowlers push through one side of the base with raw damage, while Bat Spells clean up the opposite side. The combination of ground power and Bat cleanup makes this incredibly efficient when used against the right bases.
 PEKKA troop
Army Composition
| Troop | Quantity | Role |
|---|---|---|
| P.E.K.K.A | 4 | Heavy tank + damage |
| Bowler | 8 | Ranged splash |
| Ice Golem | 2 | Front-line tank |
| Witch | 2 | Skeleton support |
| Archer | 4 | Funnel |
Spells
| Spell | Quantity | Purpose |
|---|---|---|
| Rage Spell | 2 | Core push |
| Heal Spell | 1 | Sustain the push |
| Freeze Spell | 3 | Protect Bats + disable defenses |
| Bat Spell | 4 | Backend cleanup |
Hero Equipment
- Barbarian King: Rage Vial + Giant Gauntlet
- Archer Queen: Healer Puppet + Giant Arrow
- Grand Warden: Eternal Tome (ground mode) + Healing Tome
- Royal Champion: Seeking Shield + Hog Rider Puppet
Step-by-Step Deployment
- 1Identify the split. Look at the base and find where Wizard Towers and Bomb Towers are. Your ground push goes to the side WITH splash defenses. Bats go to the side WITHOUT splash.
- 1Funnel with heroes. Barbarian King and Archers on one side, Royal Champion on the other.
- 1Ice Golems first. Deploy 2 Ice Golems at the entry point to absorb initial fire.
- 1PEKKAs behind Ice Golems. Deploy 4 PEKKAs in a line. They hit extremely hard and can tank significant damage.
- 1Bowlers behind PEKKAs. Deploy 8 Bowlers — their bouncing boulders hit buildings behind PEKKAs for massive splash damage.
- 1Witches on flanks. Deploy 1 Witch on each side to provide skeleton distraction support.
- 1Grand Warden ground. Deploy Warden with the main push. Tome when entering the core.
- 1Rage through the core. Drop Rage Spells as PEKKAs and Bowlers enter high-value areas.
- 1Bat Spells on backend. Once the ground push clears 50-60% of the base, deploy all 4 Bat Spells on the remaining defenses on the opposite side.
- 1Freeze for Bats. Immediately Freeze the nearest Wizard Tower when deploying Bats. A second Freeze on another splash defense if needed. Never deploy Bats without a Freeze ready.
When to Use
- Best against bases with splash defenses concentrated on one side
- Strong when you can clearly identify a "push side" vs "bat side"
- PEKKAs handle the Monolith better than Golems (fewer HP means less percentage damage)
- Avoid against bases with Wizard Towers evenly spread across the layout
Strategy 6: Sui LaLo (Lava Hound + Balloon)
LaLo at TH16 follows the same principles as higher Town Hall levels — sacrifice heroes to eliminate key defenses, then sweep the base with Lava Hounds and Balloons. At TH16, the Monolith adds an air-targeting threat that must be accounted for.
 Bowler troop
Army Composition
| Troop | Quantity | Role |
|---|---|---|
| Lava Hound | 4 | Air tank |
| Balloon | 22 | Main damage |
| Ice Golem | 2 | Kill squad tank |
| Wizard | 3 | Kill squad funnel |
| Minion | 5 | Cleanup |
Spells
| Spell | Quantity | Purpose |
|---|---|---|
| Haste Spell | 5 | Speed up Balloons |
| Rage Spell | 1 | Kill squad boost |
| Freeze Spell | 2 | Disable Infernos during LaLo |
| Poison Spell | 1 | CC troops |
Hero Equipment
- Barbarian King: Rage Vial + Earthquake Boots
- Archer Queen: Giant Arrow + Healer Puppet
- Grand Warden: Eternal Tome (air mode) + Life Gem
- Royal Champion: Seeking Shield + Hog Rider Puppet
Step-by-Step Deployment
- 1Plan the kill squad. Identify 1-2 Air Defenses, the Eagle Artillery, or Monolith that your heroes need to take out. Choose an entry side where these are reachable.
- 1Ice Golems + King. Deploy Ice Golems to tank, then Barbarian King behind. Use Wizards for funnel.
- 1Queen for snipe. Deploy Archer Queen once funneled. Use Giant Arrow to snipe the Eagle, Air Defense, or Monolith.
- 1Rage heroes + Poison CC. Rage the hero kill squad. Poison enemy CC troops when they emerge.
- 1Royal Champion on different angle. Send RC to eliminate another Air Defense or key defense from a different side.
- 1Start LaLo. Deploy 1 Lava Hound per remaining Air Defense. Lava Hounds go first, then Balloons follow.
- 1Surgical Balloons. Deploy 2-3 Balloons per defense, sweeping clockwise or counterclockwise around the base. Do not mass deploy.
- 1Haste ahead of path. Drop Haste Spells 3-4 tiles ahead of where your Balloons are heading.
- 1Grand Warden air. Deploy Warden to follow LaLo. Save Tome for Scattershot clusters or when Balloons group near splash.
- 1Freeze remaining threats. Freeze multi-target Infernos or Wizard Towers that threaten your Balloon groups.
- 1Minions for cleanup. Deploy Minions on remaining buildings for the 3-star finish.
When to Use
- Best against bases with accessible key defenses for hero kill squad
- Strong when Air Defenses are spread along the perimeter
- Highest skill ceiling at TH16 — devastating when executed well
- Avoid against centralized, unreachable Air Defenses
Hero Equipment Guide for TH16
Barbarian King
Archer Queen
Grand Warden
Royal Champion
Dealing with the Monolith
The Monolith is the defining defense at TH16. It deals percentage-based damage, meaning high-HP troops lose HP faster than you might expect. Here is how to handle it:
- In Smash strategies: Use Earthquake Spells to open the core so your troops reach the Monolith faster. Freeze it when your main group is in range. Do not let troops sit under Monolith fire without Heal or Freeze support.
- In Hybrid: Include the Monolith in your kill squad targets. If the Queen can snipe it with Giant Arrow, the rest of the attack becomes much easier.
- In LaLo: Target the Monolith with your hero kill squad. The Monolith targets air troops too, and its percentage damage makes Lava Hounds melt faster than expected.
- In E-Drag: Freeze the Monolith when your E-Drags are in range. E-Drags have high HP but the Monolith shreds them with percentage damage.
- In PEKKABoBat: PEKKAs handle the Monolith better than Golems because they have lower total HP, meaning the percentage damage is less devastating. Still Freeze it for safety.
Common TH16 Mistakes
- 1Ignoring the Monolith — The Monolith is not just another defense. Its percentage damage punishes any troop that lingers in range. Always have a plan for it.
- 1Bad funneling — At TH16, one misplaced troop can cause your entire army to walk around the base. Invest 30-45 seconds into creating a wide funnel before committing.
- 1Early Warden Tome — Save the Tome for the core, not the perimeter. The core is where damage concentrates most.
- 1Wrong Inferno counter — Single-target Infernos are countered by skeleton swarms (Witches). Multi-target Infernos require Freeze Spells. Know which type the base uses before choosing your strategy.
- 1Bat deployment without Freeze — Bats die instantly to Wizard Towers. Always have a Freeze ready when deploying Bat Spells.
- 1Not checking Spell Tower — The Spell Tower at TH16 can hold Rage (dangerous if it speeds up defenses near your troops) or Poison (kills your small troops). Check where it is and plan around it.
- 1Neglecting Royal Champion — The RC is one of the most powerful units at TH16. Deploy her intentionally to snipe key defenses, not as an afterthought.
Best TH16 Bases to Practice Against
The best way to improve at TH16 attacks is practice. Browse our TH16 base layout collection to find war, trophy, farming, and CWL bases you can copy and practice against in Friendly Challenges.
Focus on practicing against:
- Anti-3 War Bases — Designed to prevent 3-stars with tricky pathing
- Ring Bases — Force troops to circle instead of pushing through
- Asymmetrical Bases — Require different attack angles than mirrored layouts
- Anti-Root Rider Bases — Specifically designed with spread compartments to counter Root Rider Smash
Frequently Asked Questions
What is the best TH16 attack strategy?
Root Rider Smash is the most consistent TH16 strategy in 2026. It works against the widest range of bases and has the highest average 3-star rate. For skilled attackers, Hybrid and LaLo offer even higher potential against specific base types.
Is GoBoWitch still good at TH16?
Yes. GoBoWitch is one of the most reliable TH16 strategies, especially for CWL. Its straightforward deployment makes it forgiving for less experienced attackers while still delivering 3-stars against many base designs.
How do I deal with the Monolith at TH16?
The Monolith deals percentage-based HP damage. Freeze it when your main army is in range, include it in your kill squad targets if possible, or avoid lingering troops near it. In Hybrid, the Queen with Giant Arrow can snipe it from the kill squad side.
What Siege Machine should I use at TH16?
Log Launcher for ground strategies (breaks walls on a path to the core), Stone Slammer for E-Drag (tanks air while heading to the center), and Siege Barracks for Hybrid (extra troops from a different angle). Wall Wrecker is also viable for GoBoWitch.
Should I use Bat Spells at TH16?
Bat Spells are excellent at TH16 in PEKKABoBat and Yeti Smash strategies. The key rule: always identify where Wizard Towers are and always have a Freeze ready when deploying Bats. Without Freeze protection, Bats are worthless.
What is the easiest TH16 attack?
Electro Dragon Spam is the easiest to execute. Line deployment with Rage Spells requires minimal real-time decision making. GoBoWitch is also beginner-friendly with a straightforward deployment sequence.
TH16 is the proving ground where good attackers become great ones. Master Root Rider Smash for consistency, learn Hybrid for precision, and practice LaLo for the hardest bases. Check out our TH16 base layouts for practice targets, and read our TH17 and TH18 guides when you are ready to level up.
Time to dominate TH16, Chief.