
Best TH18 Attack Strategies 2026 — Top War & CWL Armies
Master the best TH18 attack strategies for 2026. Complete guide to Root Rider Smash, Hydra, Yeti Smash, LaLo, and more top war armies with step-by-step deployment guides.
Table of Contents
Town Hall 18 is the highest level in Clash of Clans as of 2026, and attacking at this level requires mastery of troop compositions, hero abilities, spell timing, and funnel management. With the introduction of the Spirit Fox hero, new hero equipment, and rebalanced defenses, TH18 attacks look very different from even a year ago.
Whether you are pushing in Legend League, competing in Clan War League, or just trying to 3-star in regular clan wars, this guide breaks down the best TH18 attack strategies in the current meta. Each strategy includes the full army composition, spell selection, hero equipment recommendations, and a step-by-step deployment guide.
What Changed at TH18
Town Hall 18 introduced several game-changing features that directly impact attack strategies:
- Spirit Fox — The fifth hero. The Spirit Fox phases through walls, targets defenses, and has a cloak ability that makes it temporarily invisible. This hero changes how you approach funneling and core dives.
- New Hero Equipment — TH18 unlocks additional hero equipment options including upgrades that can drastically change how your heroes perform in battle.
- Merged Defenses — Some defenses received upgrades and new levels, making bases harder to crack with brute force. Multi-target Inferno Towers, Scattershots, and Eagle Artillery all hit harder at max TH18 levels.
- Spell Tower Level 4 — The Spell Tower at TH18 can hold stronger spells, adding another layer of defensive complexity.
- New Troop Levels — Several troops received new upgrade levels, shifting the meta toward specific compositions.
Understanding these changes is crucial. The strategies below are built around the TH18 meta as of early 2026.
Strategy 1: Root Rider Smash
Root Rider Smash is the most dominant TH18 attack strategy in 2026. Root Riders are incredibly tanky troops that ride on massive roots, smashing through walls and buildings. When paired with support troops and properly funneled, they can steamroll even the most well-designed bases.
 Root Rider troop
Army Composition
| Troop | Quantity | Role |
|---|---|---|
| Root Rider | 6 | Main damage + wall breaking |
| Witch | 6 | Skeleton spawns for distraction |
| Ice Golem | 2 | Tank + freeze on death |
| Healer | 2 | Keep Root Riders alive |
| Archer | 5 | Funnel cleanup |
Spells
| Spell | Quantity | Purpose |
|---|---|---|
| Rage Spell | 3 | Boost Root Rider damage in core |
| Freeze Spell | 2 | Disable Inferno Towers |
| Heal Spell | 1 | Sustain through splash damage |
| Earthquake Spell | 4 | Open core compartments |
Hero Equipment
- Barbarian King: Rage Vial + Giant Gauntlet
- Archer Queen: Healer Puppet + Giant Arrow
- Grand Warden: Eternal Tome (air mode) + Healing Tome
- Royal Champion: Seeking Shield + Hog Rider Puppet
- Spirit Fox: Default equipment
Step-by-Step Deployment
- 1Earthquake the core. Use all 4 Earthquake Spells to open up the center of the base where the Town Hall, Eagle Artillery, and key defenses sit. This saves your Root Riders from pathing around walls.
- 1Create a funnel. Deploy 2-3 Archers on each side of your entry point to clear trash buildings. Send the Barbarian King on one side and the Royal Champion on the other to widen the funnel.
- 1Deploy Ice Golems. Drop 2 Ice Golems at your entry point to absorb initial damage from defenses near the edge.
- 1Send in Root Riders. Deploy all 6 Root Riders in a line behind the Ice Golems. They will root-dash through walls and head toward the core.
- 1Support with Witches. Place all 6 Witches behind the Root Riders. The skeletons they spawn absorb single-target Inferno damage and distract defenses.
- 1Deploy Healers. Place 2 Healers behind the group to keep the Root Riders alive as they push through.
- 1Grand Warden follows. Deploy the Grand Warden in air mode to follow the Root Rider push. Save Eternal Tome for when the group reaches the core or encounters heavy splash damage.
- 1Rage through the core. As your troops enter the center, drop Rage Spells to amplify Root Rider damage. Use Freeze Spells on multi-target Infernos or Scattershots.
- 1Spirit Fox for cleanup. Deploy the Spirit Fox on the opposite side of the base to pick off remaining defenses. Its wall-phasing ability lets it reach buildings other troops cannot.
- 1Heal Spell as needed. Drop the Heal Spell on your main group if they are taking heavy damage from Wizard Towers or Bomb Towers.
When to Use Root Rider Smash
- Works on almost any base layout — it is the most versatile TH18 strategy
- Best against bases with centralized Town Halls and compact compartments
- Strong against single-target Inferno bases (Witches counter them)
- Avoid using against spread-out bases with many isolated compartments
Strategy 2: Hydra (Electro Dragon + Root Rider)
Hydra is a hybrid strategy that combines the aerial power of Electro Dragons with the ground tanking of Root Riders. The name comes from the multi-headed attack approach — ground and air working simultaneously. This strategy is excellent for bases where a pure ground approach would get shredded by splash defenses.
Army Composition
| Troop | Quantity | Role |
|---|---|---|
| Electro Dragon | 4 | Aerial chain damage |
| Root Rider | 4 | Ground tank + wall break |
| Balloon | 8 | Target defenses behind E-Drags |
| Ice Golem | 1 | Front-line tank |
| Archer | 3 | Funnel |
Spells
| Spell | Quantity | Purpose |
|---|---|---|
| Rage Spell | 3 | Boost E-Drag chain damage |
| Freeze Spell | 3 | Disable Infernos + Air Defenses |
| Poison Spell | 1 | Kill CC troops |
Hero Equipment
- Barbarian King: Rage Vial + Earthquake Boots
- Archer Queen: Healer Puppet + Giant Arrow
- Grand Warden: Eternal Tome (air mode) + Life Gem
- Royal Champion: Seeking Shield + Hog Rider Puppet
- Spirit Fox: Default equipment
Step-by-Step Deployment
- 1Funnel both sides. Use Archers, Barbarian King on one side, and Royal Champion on the other to create a wide entry path.
- 1Deploy Ice Golem + Root Riders. Send the Ice Golem first, then 4 Root Riders behind it. They will charge toward the core and break walls open.
- 1Electro Dragons behind. Deploy 4 Electro Dragons in a line behind the ground troops. Their chain lightning will clear buildings in clusters.
- 1Balloons for defense targeting. Send Balloons in pairs toward remaining Air Defenses and other key defenses. Time them with Rage Spells.
- 1Grand Warden air mode. Deploy Warden to follow the E-Drags. Save Tome for when they hit the core or encounter heavy anti-air.
- 1Rage the E-Drag chain. Drop Rage Spells on clumps of buildings where E-Drags can chain maximum damage. A raged E-Dragon chain can clear half a base.
- 1Freeze key defenses. Freeze multi-target Infernos, Scattershots, or Air Defenses that threaten your E-Drags.
- 1Spirit Fox cleanup. Send Spirit Fox through walls to snipe remaining defenses on the back side.
When to Use Hydra
- Best against bases with clustered buildings (E-Drag chains do massive damage)
- Strong against bases with anti-ground layouts heavy on splash
- Good choice when you see weak anti-air coverage
- Avoid on spread-out bases where E-Drag chain lightning cannot connect
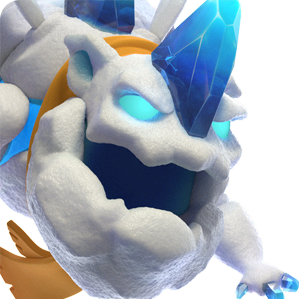
Strategy 3: Yeti Smash
Yeti Smash is a raw power strategy that relies on the sheer HP and damage of Yetis combined with Bowlers and Witches. This is one of the most consistent TH18 strategies because it is hard to mess up — the troops naturally group and push through bases.
 Yeti troop
Army Composition
| Troop | Quantity | Role |
|---|---|---|
| Yeti | 7 | Main tank + damage |
| Bowler | 5 | Ranged splash behind Yetis |
| Witch | 4 | Skeleton distraction |
| Ice Golem | 2 | Front-line freeze tank |
| Healer | 2 | Support healing |
Spells
| Spell | Quantity | Purpose |
|---|---|---|
| Rage Spell | 3 | Core push |
| Heal Spell | 1 | Sustain through splash |
| Freeze Spell | 2 | Inferno + Scattershot control |
| Bat Spell | 3 | Backend cleanup |
Hero Equipment
- Barbarian King: Rage Vial + Giant Gauntlet
- Archer Queen: Healer Puppet + Giant Arrow
- Grand Warden: Eternal Tome (ground mode) + Healing Tome
- Royal Champion: Seeking Shield + Hog Rider Puppet
- Spirit Fox: Default equipment
Step-by-Step Deployment
- 1Funnel carefully. Yetis have unpredictable pathing if the funnel is not wide enough. Use Barbarian King + Archers on one side and Royal Champion on the other to clear at least 2-3 buildings per side.
- 1Ice Golems first. Deploy both Ice Golems at the center of your entry point to absorb initial fire.
- 1Yetis in a line. Deploy all 7 Yetis in a spread line behind the Ice Golems. Do not bunch them — a spread deployment ensures they cover more ground.
- 1Bowlers behind Yetis. Place all 5 Bowlers behind the Yetis. Their bouncing boulders will hit buildings over the Yetis' heads, dealing massive splash damage.
- 1Witches on flanks. Place 2 Witches on each side of the main push. Skeletons create distractions and absorb single-target Inferno beams.
- 1Grand Warden ground mode. Deploy Warden with the ground push. His aura boosts the HP of your entire group. Save Tome for the core.
- 1Healers on Yetis. Deploy 2 Healers to keep the Yeti frontline alive as they push through.
- 1Rage the core. Drop Rage Spells as the group enters high-value areas. A raged Bowler behind a Yeti is one of the highest DPS combinations in the game.
- 1Freeze Infernos. Multi-target Infernos shred Yeti Smash. Freeze them immediately when your group is in range.
- 1Bat Spells for backend. Once the main push clears 50-60% of the base, deploy all 3 Bat Spells on the remaining defenses at the back. Pair with a Freeze if needed to protect the bats from Wizard Towers.
When to Use Yeti Smash
- Best against compact, symmetrical bases
- Excellent when single-target Infernos are used (Witches counter them)
- Strong when Wizard Towers and Bomb Towers are centralized (Yetis tank through them)
- Avoid against bases with multi-target Infernos covering the core
Strategy 4: Sui LaLo (Lava Hound + Balloon)
LaLo (Lava Hound + Balloon) has been a top-tier strategy since the early days of Clash of Clans, and it remains incredibly strong at TH18. The "Sui" prefix means Suicide Heroes — you sacrifice your heroes to take out key defenses (usually the Queen, Eagle, or Infernos) before deploying the LaLo backend.
 Lava Hound troop
Army Composition
| Troop | Quantity | Role |
|---|---|---|
| Lava Hound | 4 | Air tank |
| Balloon | 20 | Main damage vs defenses |
| Ice Golem | 2 | Hero kill squad tank |
| Wizard | 3 | Funnel for heroes |
| Archer | 3 | Funnel support |
Spells
| Spell | Quantity | Purpose |
|---|---|---|
| Haste Spell | 5 | Speed up Balloons |
| Rage Spell | 1 | Hero kill squad |
| Freeze Spell | 2 | Disable Infernos during LaLo |
| Poison Spell | 1 | Kill CC troops during hero phase |
Hero Equipment
- Barbarian King: Rage Vial + Earthquake Boots
- Archer Queen: Giant Arrow + Healer Puppet
- Grand Warden: Eternal Tome (air mode) + Life Gem
- Royal Champion: Seeking Shield + Hog Rider Puppet
- Spirit Fox: Default equipment
Step-by-Step Deployment
- 1Identify the kill squad target. Before attacking, decide what your heroes need to eliminate: usually the Eagle Artillery, an Inferno Tower, or a key Air Defense. Plan a side of the base where heroes can reach these targets.
- 1Deploy Ice Golems + Heroes. Send 2 Ice Golems to tank, then deploy Barbarian King behind them. Deploy Wizards to funnel. Once the path is clear, send the Archer Queen with her ability ready.
- 1Rage the hero push. Drop a Rage Spell on your heroes as they approach the target. Use the Queen's Giant Arrow ability to snipe the high-value defense.
- 1Poison enemy CC. When the enemy Clan Castle troops come out, drop Poison on them. Let your heroes clean them up with the kill squad.
- 1Royal Champion to snipe. Deploy the Royal Champion on a different angle to take out another key defense (second Inferno or Air Defense).
- 1Start LaLo. Once key defenses are down, begin the Lava Hound + Balloon deployment. Send Lava Hounds first toward remaining Air Defenses.
- 1Balloons in surgical groups. Deploy 2-3 Balloons per defense point, working around the base in a clockwise or counterclockwise sweep. Do not deploy all Balloons at once.
- 1Haste the Balloons. Drop Haste Spells ahead of your Balloon path so they move quickly between defenses. Speed prevents splash damage from stacking.
- 1Grand Warden air mode. Deploy Warden to follow the LaLo push. Save Tome for when Balloons cluster near Scattershots or Wizard Towers.
- 1Freeze remaining threats. Use Freeze Spells on multi-target Infernos or Wizard Towers that threaten your Balloon groups.
- 1Spirit Fox for cleanup. The Spirit Fox can phase through walls to reach the last few percentage points of buildings that Balloons miss.
When to Use Sui LaLo
- Best against bases with exposed or reachable key defenses (Eagle, Infernos)
- Strong when Air Defenses are spread out (each Lava Hound covers one)
- Excellent against bases with few multi-target Infernos
- Requires high skill — hero kill squad timing is critical
- Avoid against bases with centralized, unreachable Air Defenses
Strategy 5: Blizzard LaLo
Blizzard LaLo is a variation that uses an Invisibility Spell + Super Witch Blimp to destroy the Town Hall or core defenses before following up with LaLo. The "Blizzard" refers to the Super Witch's big boy ability combined with Invisibility to sneak past defenses.
Army Composition
| Troop | Quantity | Role |
|---|---|---|
| Lava Hound | 3 | Air tank for LaLo |
| Balloon | 22 | Defense targeting |
| Ice Golem | 1 | Tanking |
| Archer | 5 | Funnel cleanup |
Clan Castle: Super Witch + Ice Golem + Invisibility Spell in a Battle Blimp
Spells
| Spell | Quantity | Purpose |
|---|---|---|
| Invisibility Spell | 2 | Blimp payload protection |
| Haste Spell | 5 | Balloon speed |
| Freeze Spell | 2 | Inferno control |
Step-by-Step Deployment
- 1Send the Battle Blimp. Aim the Blimp directly at the Town Hall. The Blimp needs to reach the core and pop.
- 1Invisibility on payload. As soon as the Blimp pops, drop 2 Invisibility Spells on the Super Witch and Ice Golem. The Super Witch spawns a Big Boy that targets the Town Hall while invisible.
- 1Town Hall destroyed. If executed correctly, the Blizzard destroys the Town Hall and surrounding defenses before the base can react.
- 1Deploy LaLo. With the core destroyed, send Lava Hounds toward remaining Air Defenses and follow with surgical Balloon deployment.
- 1Haste the sweep. Haste Spells keep Balloons moving quickly around the base.
- 1Heroes for value. Deploy heroes to clean up one side — Barbarian King + Archer Queen can clear a flank while LaLo handles the rest.
- 1Freeze Infernos. Save Freezes for any multi-target Infernos that survived the Blizzard.
When to Use Blizzard LaLo
- Best when the Town Hall is reachable by a Battle Blimp straight line
- Strong against bases where destroying the TH removes Giga Inferno + surrounding defenses
- Requires good CC coordination — you need a Super Witch in your Blimp
- Avoid when the base has Seeking Air Mines near the TH that will pop the Blimp early
Strategy 6: DragBat (Mass Dragon + Bat Spell)
DragBat is a straightforward but effective strategy that uses mass Dragons to push through one side of the base while Bat Spells clean up the other. It is less skill-intensive than LaLo and works well in war situations where you need a reliable 3-star.
 Dragon troop
Army Composition
| Troop | Quantity | Role |
|---|---|---|
| Dragon | 9 | Main damage |
| Balloon | 6 | Defense targeting |
| Ice Golem | 1 | Tank for funnel |
Spells
| Spell | Quantity | Purpose |
|---|---|---|
| Rage Spell | 2 | Boost Dragons in core |
| Freeze Spell | 3 | Protect Bats + disable defenses |
| Bat Spell | 5 | Backend cleanup |
Step-by-Step Deployment
- 1Choose your split. Identify which half of the base has Wizard Towers and Bomb Towers. Your Dragons go to that side. Bats go to the side without splash defenses.
- 1Funnel with heroes. Barbarian King on one flank, Royal Champion on the other. Clear corner buildings.
- 1Deploy Dragons in a line. Spread 9 Dragons across your entry side. Follow with Balloons targeting defenses behind the Dragons.
- 1Grand Warden in air. Send Warden with the Dragon push. Save Tome for Eagle Artillery fire or Scattershot.
- 1Rage through the core. Drop Rage Spells as Dragons enter the base interior. Raged Dragons deal devastating damage.
- 1Bat Spell on the backend. Once your Dragons clear 50-60% of the base, deploy all 5 Bat Spells on the remaining defenses on the opposite side.
- 1Freeze for Bats. Immediately Freeze any Wizard Towers or multi-target Infernos near your Bats. A single Wizard Tower will destroy your entire Bat wave.
- 1Spirit Fox for percentage. Clean up remaining buildings with Spirit Fox.
When to Use DragBat
- Best against bases with splash defenses concentrated on one side
- Strong when you can identify a clear "Dragon side" vs "Bat side"
- Lower skill requirement — good for CWL when you need consistent results
- Avoid against bases with Wizard Towers spread evenly across the layout
Hero Equipment Meta at TH18
Hero equipment choices can make or break an attack at TH18. Here are the current meta picks:
Barbarian King
Archer Queen
Grand Warden
Royal Champion
Spirit Fox
The Spirit Fox is relatively new and its equipment options are still evolving. Use the default loadout while experimenting with new releases.
Spell Timing Tips
Spell timing separates average TH18 attackers from great ones. Here are key principles:
- Rage Spell: Drop it 1-2 seconds BEFORE your troops enter the area. Troops need to be inside the radius to benefit.
- Freeze Spell: Use reactively, not preemptively. Wait until your troops are actually being hit by the defense before freezing it.
- Heal Spell: Drop on your troops when they are at 50-70% HP, not when they are already almost dead. Heal has a duration — you want maximum healing ticks.
- Haste Spell: Drop AHEAD of your Balloons, not on them. Balloons are slow — they need the speed boost before they reach the next defense.
- Invisibility Spell: Timing is critical. Drop immediately when the Blimp pops — even a 1-second delay means your troops take lethal damage.
- Bat Spell: Always deploy with a Freeze ready. Bats die instantly to splash. Freeze the nearest Wizard Tower the moment you deploy Bats.
Common TH18 Attack Mistakes
Even experienced attackers make these errors at TH18:
- 1Poor funneling — The number one reason attacks fail. If your troops go around the base instead of into it, the attack is over. Always verify your funnel before sending the main army.
- 1Ignoring the Eagle Artillery — Eagle does massive damage when it activates. Either destroy it with your kill squad, Blizzard it, or time your Warden Tome for the first volley.
- 1Wasting Eternal Tome — The Grand Warden's Tome is the most valuable ability in the game. Do not use it early. Save it for the moment your entire army is taking maximum damage in the core.
- 1Bat Spell without Freeze — Deploying Bats without a Freeze ready for the nearest Wizard Tower is a guaranteed fail. Always pair Bat deployment with Freeze.
- 1Deploying all troops at once — Stagger your deployment. Heroes funnel first, then tanks, then damage dealers, then support. A staged deployment ensures your troops path correctly.
- 1Not scouting Clan Castle — At TH18, a well-timed CC defense (Super Minions, Ice Golems) can ruin an attack. Always carry a Poison Spell or have a plan for CC troops.
- 1Attacking the wrong side — Before deploying a single troop, rotate the base and identify where key defenses are. The side with the Eagle, Infernos, and TH is usually where you want your main push.
Best TH18 Base Layouts to Practice Against
Improving at TH18 attacks requires practice. Use Friendly Challenges in your clan to test these strategies against different base layouts. Check out our TH18 base layout collection for bases you can copy and practice against.
Key base types to practice:
- Anti-3 War Bases — Designed to prevent 3-stars with spread-out defenses and tricky trap placements
- Ring Bases — Troops circle the base instead of pushing through the center
- Island Bases — Key defenses are isolated in moat-style compartments
- CWL Bases — Optimized for CWL where the attacker only gets one attempt
Frequently Asked Questions
What is the best TH18 attack strategy in 2026?
Root Rider Smash is the most consistent and versatile TH18 strategy in 2026. It works against almost any base layout and has a high 3-star rate even with imperfect execution.
Is LaLo still viable at TH18?
Yes. LaLo remains one of the highest skill-ceiling strategies at TH18. In the hands of a skilled attacker, Sui LaLo and Blizzard LaLo can 3-star bases that ground strategies cannot touch.
What hero equipment should I max first at TH18?
Prioritize Rage Vial (King), Healer Puppet (Queen), Eternal Tome (Warden), and Seeking Shield (Royal Champion). These are the core equipment pieces used in almost every strategy.
How do I deal with multi-target Infernos at TH18?
Multi-target Infernos are the biggest threat at TH18. Use Freeze Spells to disable them during your push, or choose strategies like LaLo where Lava Hounds absorb the damage while Balloons destroy the Inferno.
Should I use Super Troops at TH18?
Yes. Super Witch (in Blizzard Blimp), Super Bowler, and Super Minion are all strong choices at TH18. Super Witch is essential for Blizzard LaLo, and Super Bowler can replace regular Bowlers in Yeti Smash for more damage.
How do I practice TH18 attacks?
Use Friendly Challenges in your clan. Ask clanmates to set TH18 war bases and practice your strategies. Watch replays of Legend League attacks on YouTube to learn pathing and timing. Join a competitive war clan where experienced attackers can coach you.
Mastering TH18 attacks takes practice, patience, and willingness to learn from failures. Start with Root Rider Smash for consistency, then branch out to LaLo and Hydra as you improve. Check out our TH18 base layouts for bases to practice against, and read our other Clash of Clans guides for more tips on dominating at every level.
Now get out there and start crushing TH18 bases, Chief.